Installing Visual Studio IDE
In this section, we'll guide you through the simple steps of installing Visual Studio IDE on your machine. Buckle up and let's get started!
Download the Installer
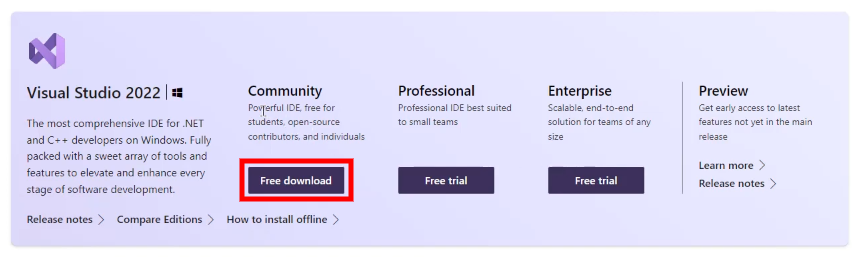
First things first - head over to the Visual Studio download page and select the edition that suits you best. For beginners, we recommend Visual Studio Community, which is free for individual developers, open-source projects, academic research, education, and small professional teams.
Click on "Free download" for Visual Studio Community Edition and save the installer file on your computer.
Run the Installer
Locate the downloaded installer file (usually in your Downloads folder) and double-click it to run. A User Account Control prompt may appear asking if you want to allow the app to make changes to your device; click "Yes."
Customize Your Installation
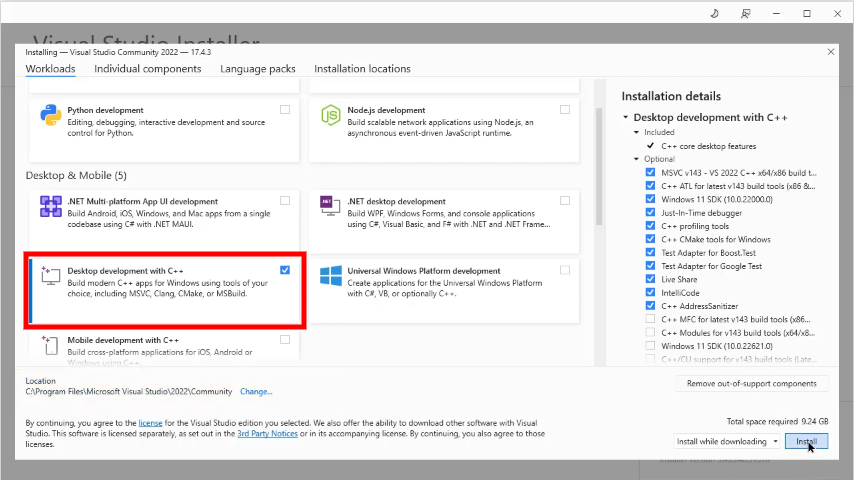
Once the installer starts, it'll present a list of workloads (a set of features tailored for specific development tasks). Find and select "Desktop development with C++" - this includes everything you need for C++ programming.
Feel free to explore other workloads too! If you're interested in game development or cross-platform mobile development, Visual Studio has got you covered.
After selecting workloads, click on "Install" at the bottom right corner of the installer window. Grab a cup of coffee while Visual Studio installs all necessary components!
Launch Visual Studio IDE
When the installation is complete, click on "Launch" to start Visual Studio IDE. It'll open a welcome screen where you can sign in with your Microsoft account or create one. Signing in helps synchronize your settings and preferences across devices.

Create Your First C++ Project
Congratulations! You've successfully installed Visual Studio IDE, and now it's time to create your first C++ project:
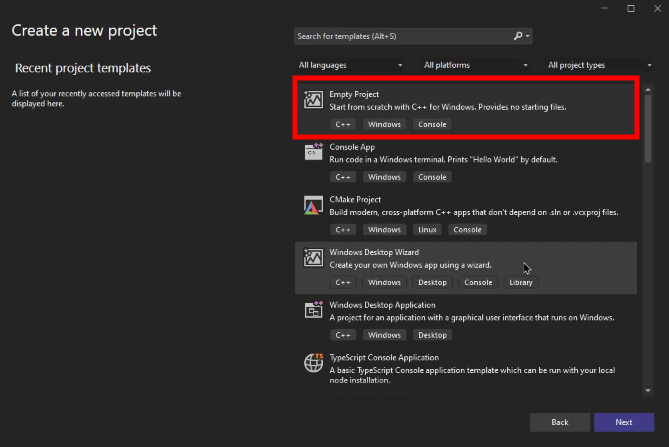
- Click on "Create a new project" from the Welcome screen.
- Choose "Empty Project" under the "C++" filter, then click "Next."
- Give your project a name and choose a location to save it.
- Click on "Create."
You're all set! Now go ahead and write your first lines of C++ code in the Source Files folder by creating a new .cpp file. The world of programming awaits!